


My Notes
Notes are a condensed and organized version of the material covered in a class, textbook, or other study material. They serve as useful tools for studying and reviewing the study material. Effective notes making involves capturing key ideas, concepts, and supporting details presented in class and study material. The process of creating study notes is just as important as the notes themselves, as it helps to reinforce your understanding of the material.
ALLEN Digital has included a “My Notes” feature to help your learning process become more efficient and streamlined, as well as time savvy. With this feature, you can upload your handwritten notes of a particular live class with the respective class. It’s like transforming your Physical Notes into Digital Notes– that can be accessible to you anytime and anywhere. It will not just save your time but also prove pretty handy to find the notes for revision purposes or any learning reference.
My Notes (Web)
On your ALLEN Digital web portal, in the “My Assets” section on the left panel, you can access the “My Notes” feature.
To upload your notes, click on the Upload option of a specific class for which you want to upload the notes (Fig: 01). 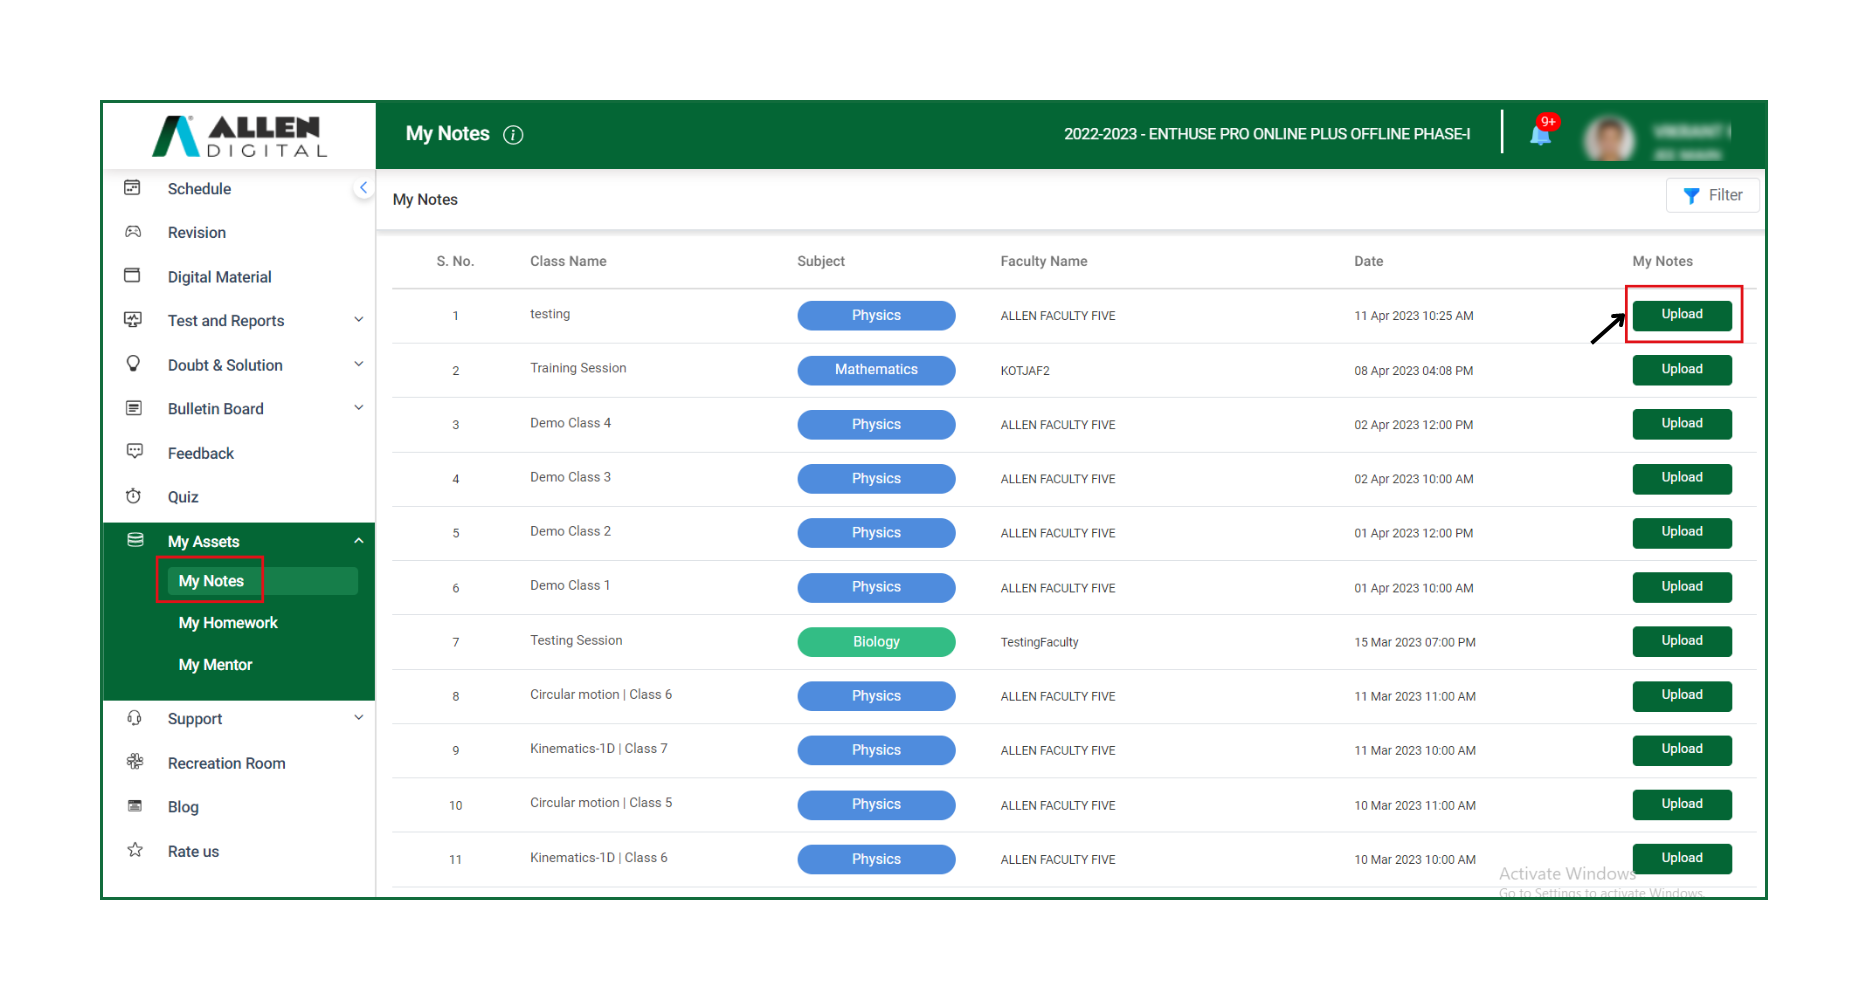
Fig: 01
Then, select the file you want to upload & click on Upload (Fig: 02).
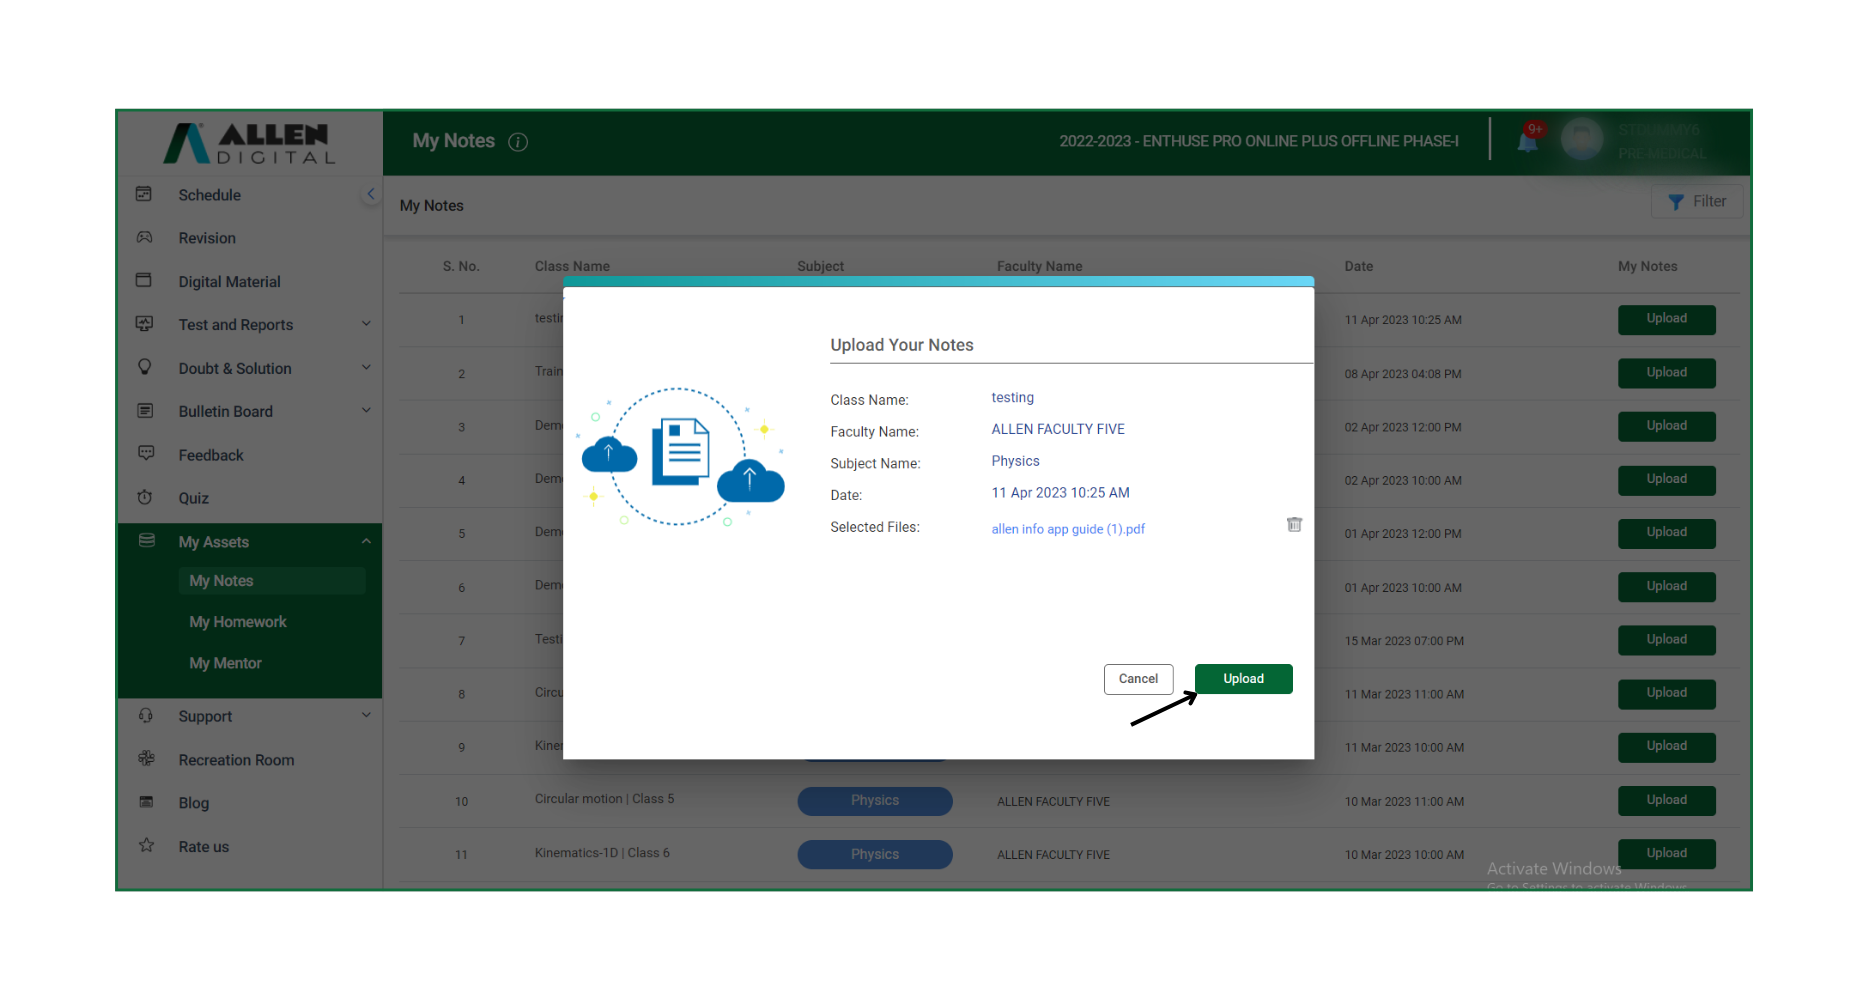 Fig: 02
Once your note file gets uploaded, you will land on the page where you will get the confirmation “Notes Uploaded Successfully” in a pop-up message as shown in Fig: 03.
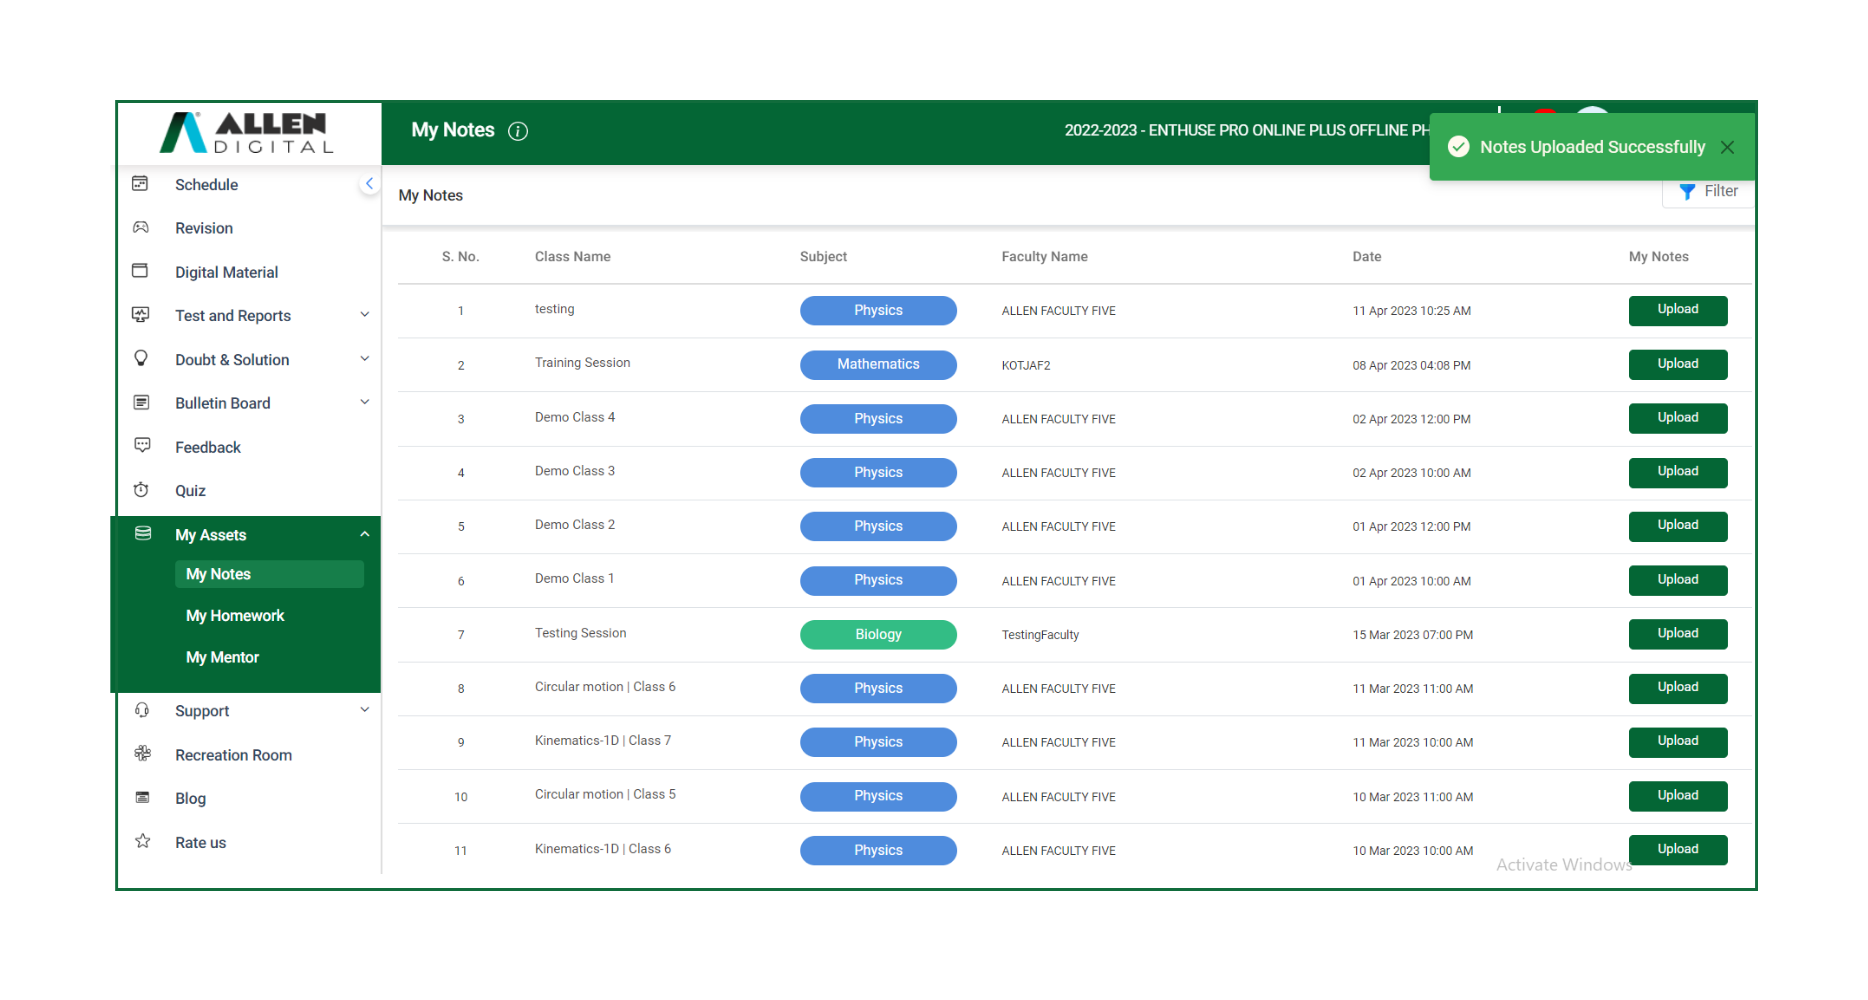 Fig: 03
To access your uploaded notes, click on the “Notes” option (as shown in Fig: 04). Additionally, you can search for uploaded notes by date, subject, and faculty by clicking on the “Filter” option available on both the web and app versions.
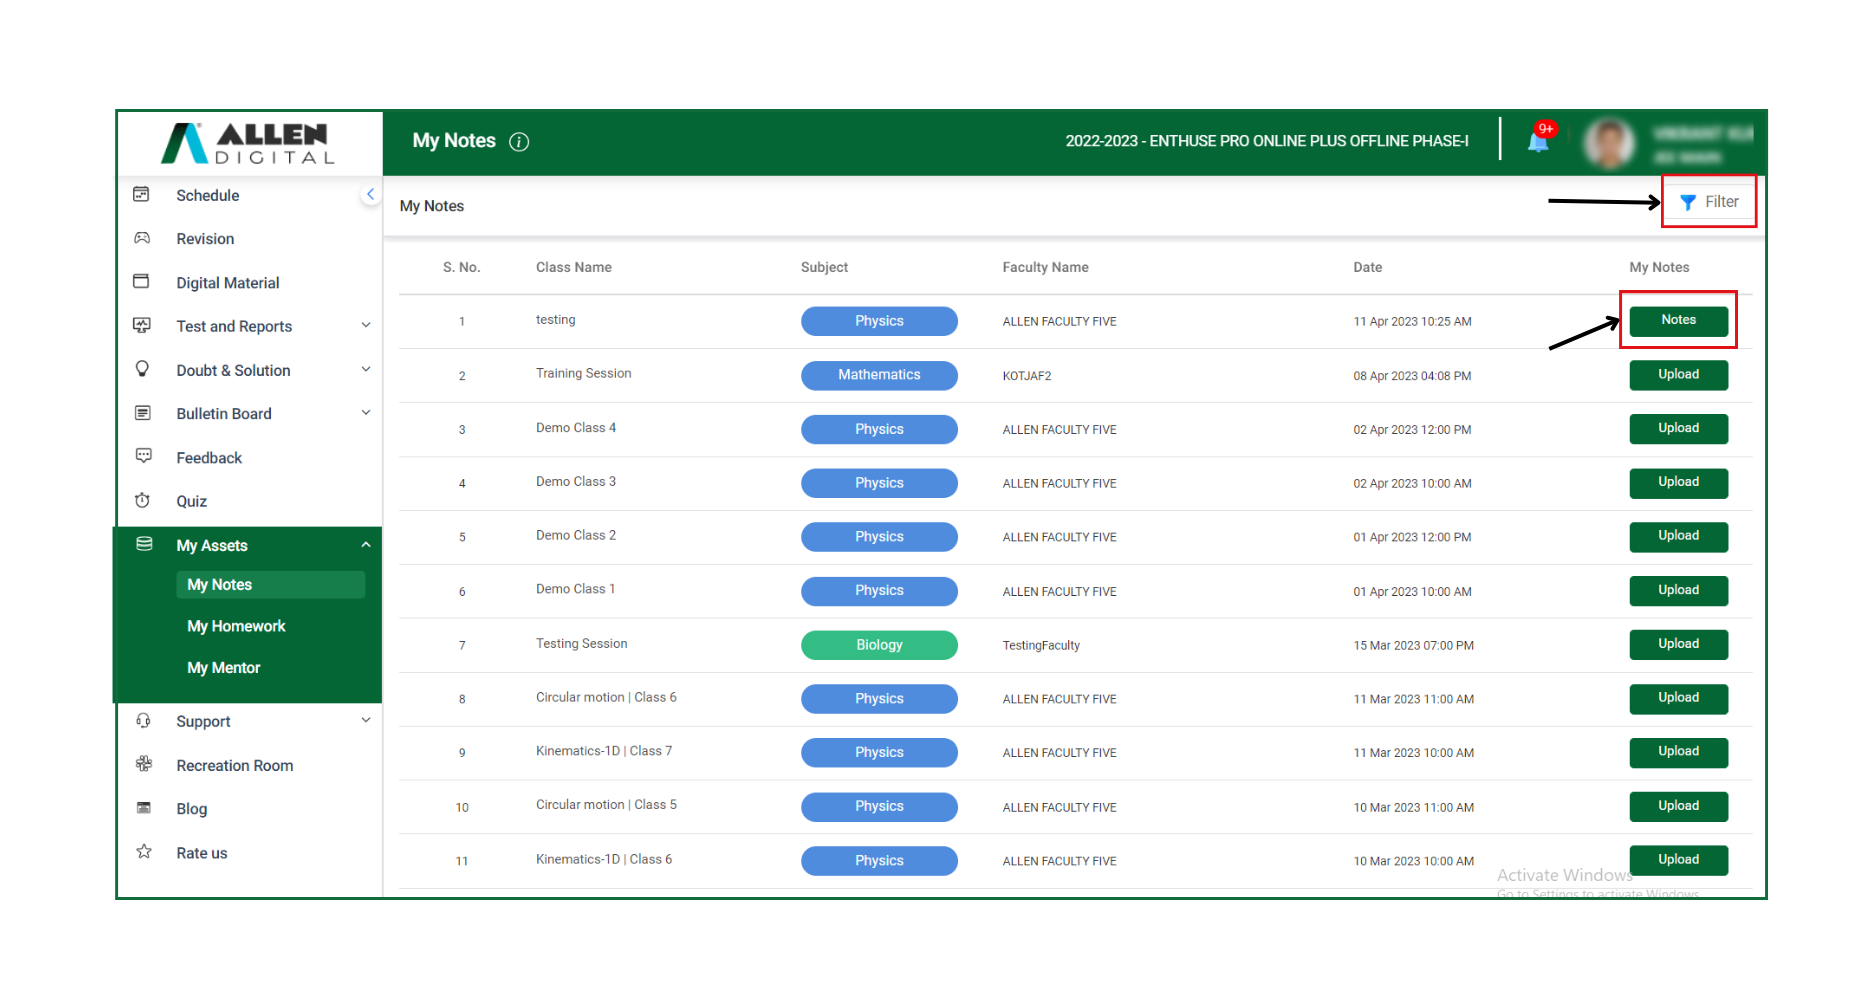 Fig: 04
As shown in Fig: 05
1. To delete the notes if uploaded incorrectly or not needed, click on the delete icon.
2. To upload additional files, click on the “Upload More” button & follow the same process.
 Fig: 05
My Notes (App)
On your ALLEN Digital App, in the “My Assets” section on the left panel, you can access the “My Notes” feature.
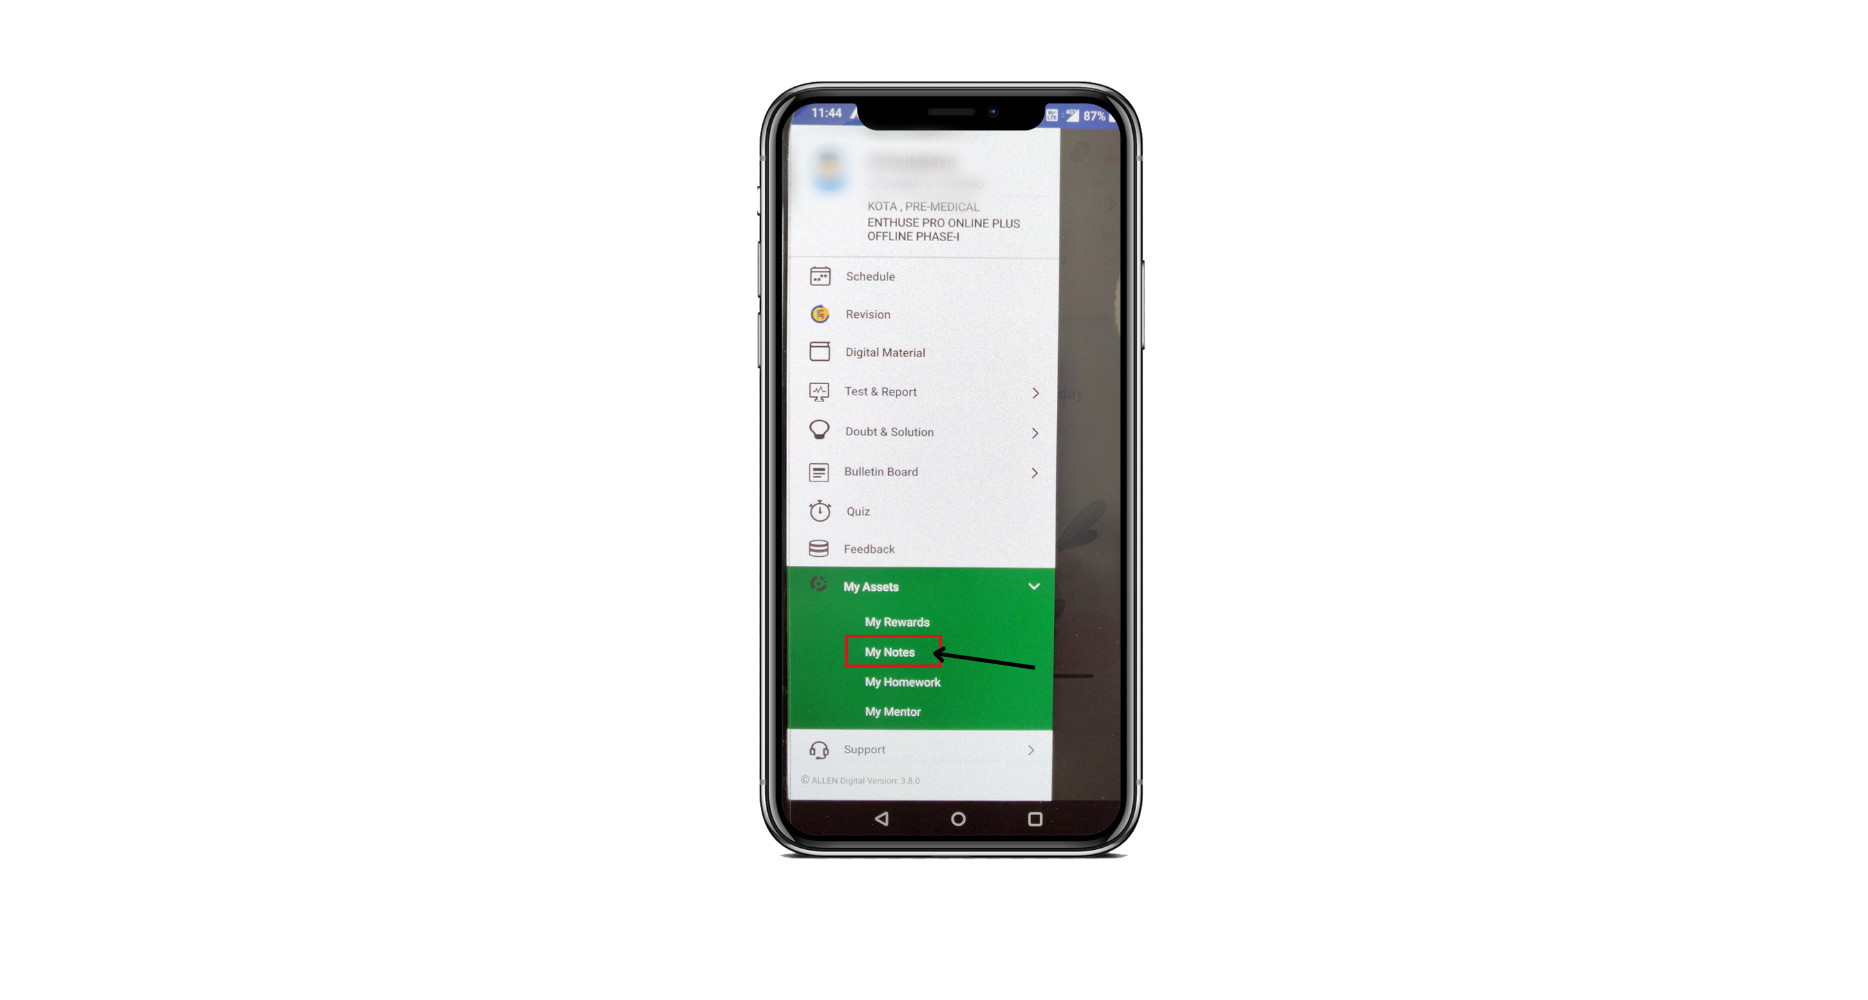 Fig: 01
To upload your notes, click on the Upload button of a specific class for which you want to upload the notes (Fig: 02).
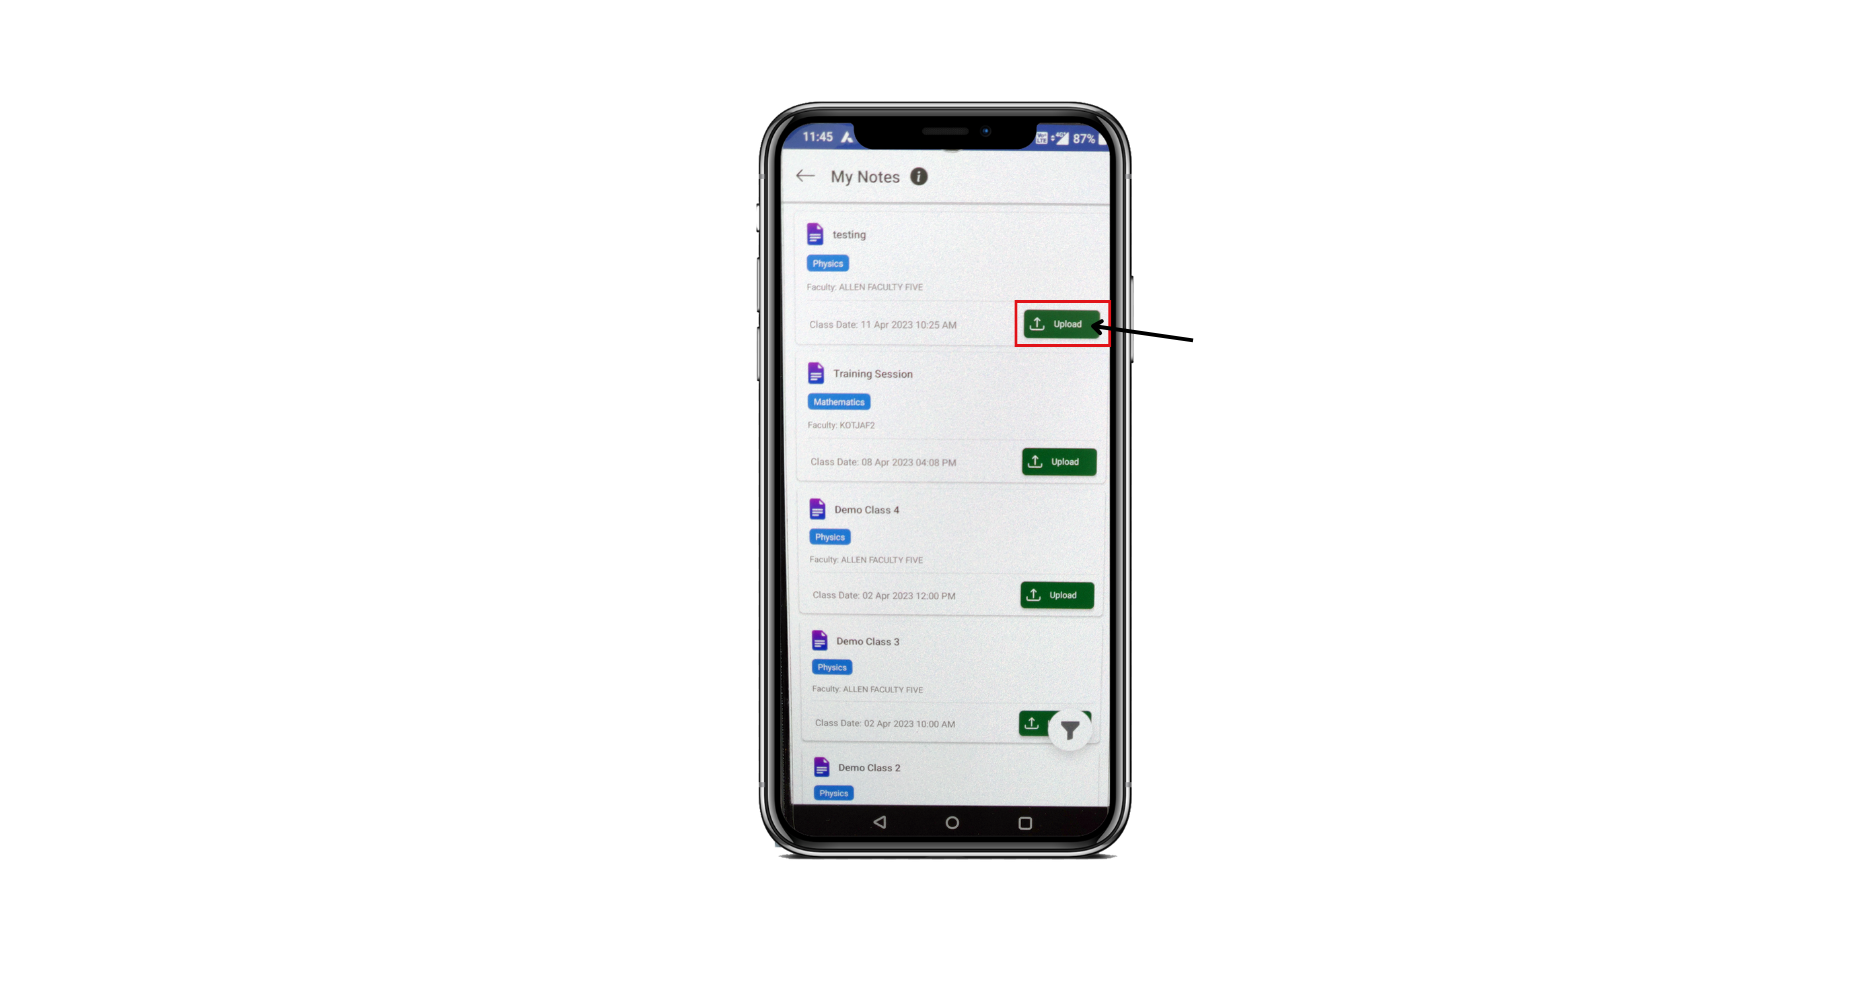
Fig: 02
Then, select the file you want to upload (Fig: 03).
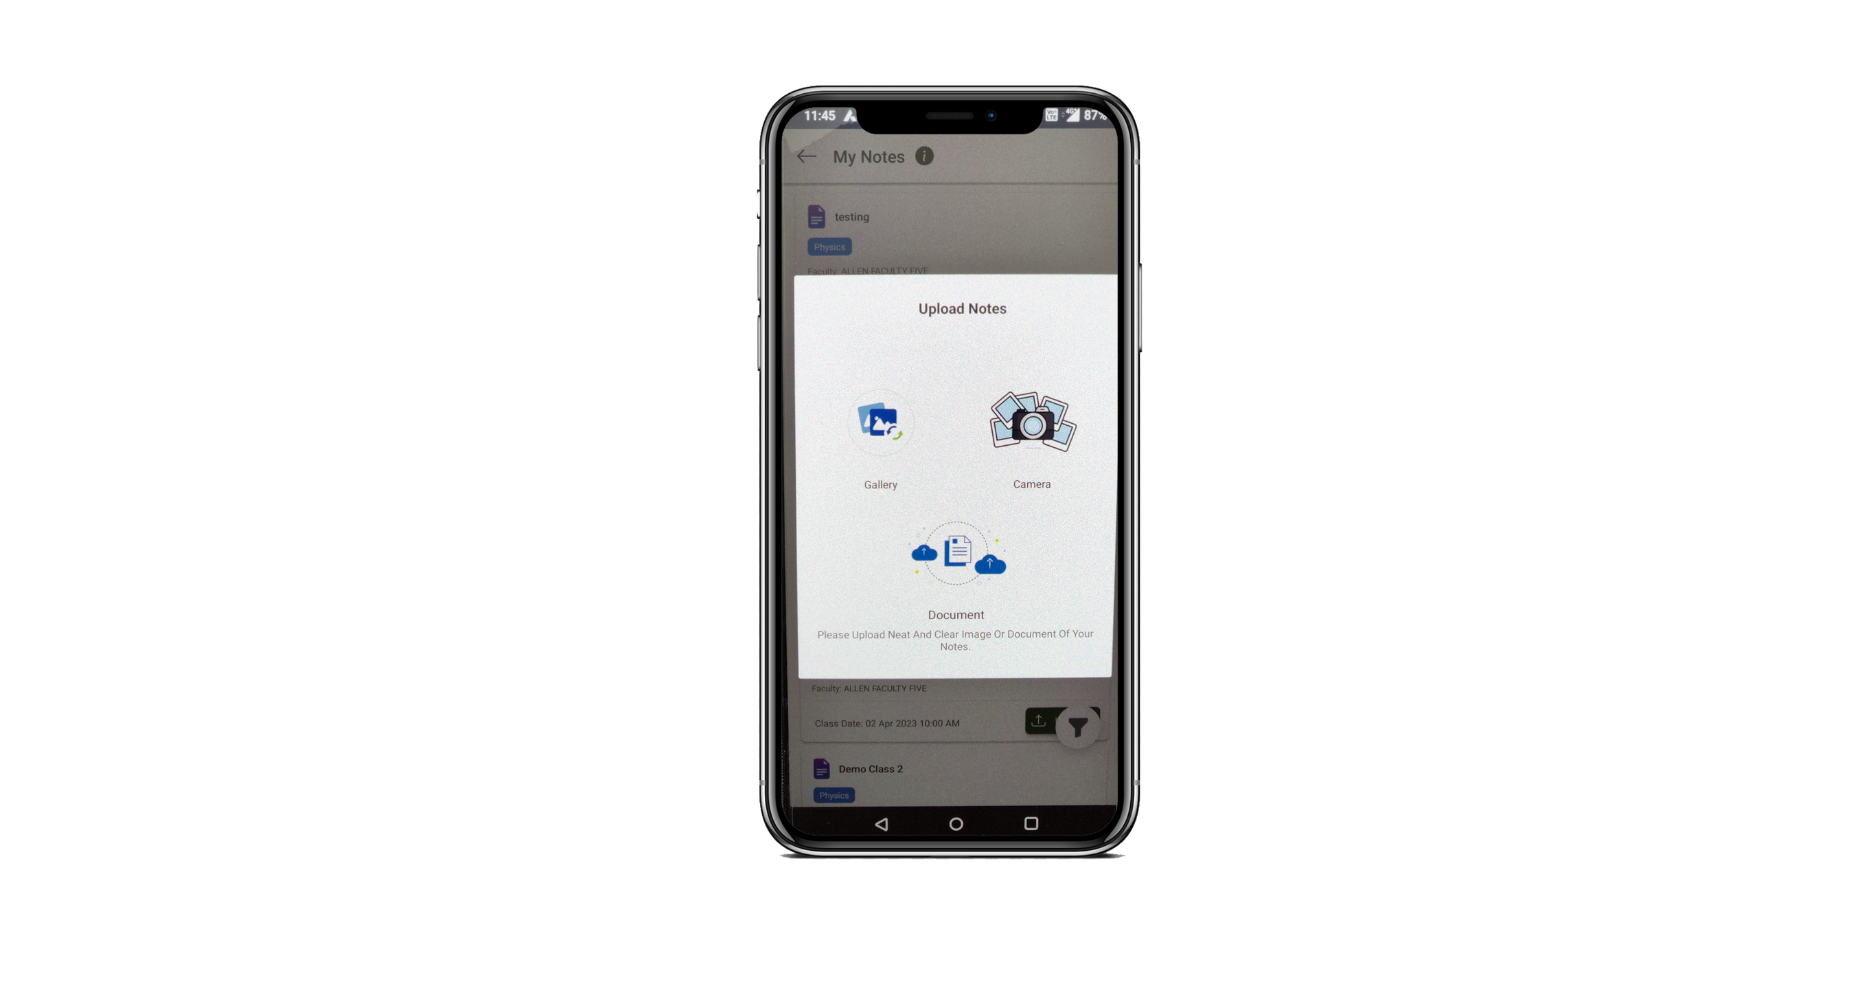 Fig: 03
Once your note file gets uploaded, you will land on the page where you will get the confirmation “Your notes have been uploaded successfully” in a pop-up message as shown in Fig: 04.
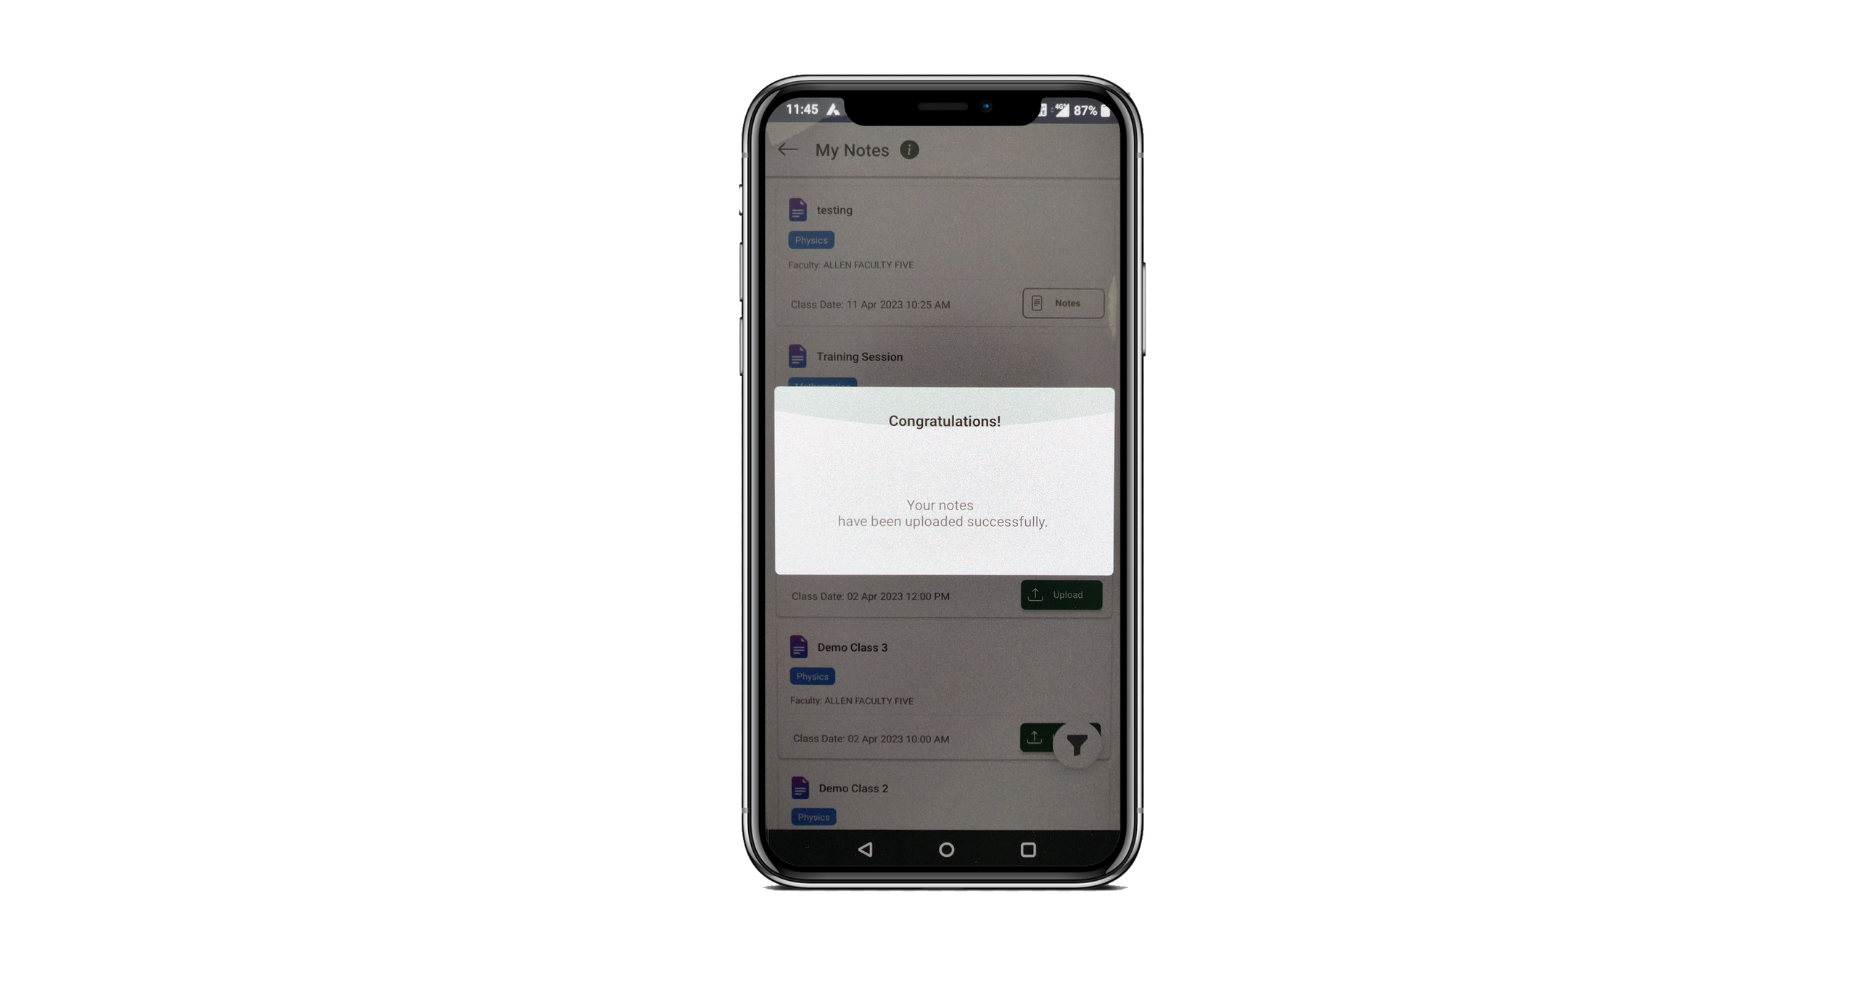 Fig: 04
To access your uploaded notes, click on the “Notes” option (as shown in Fig: 05). Additionally, you can search for uploaded notes by date, subject, and faculty by clicking on the “Filter” option available on both the web and app versions.
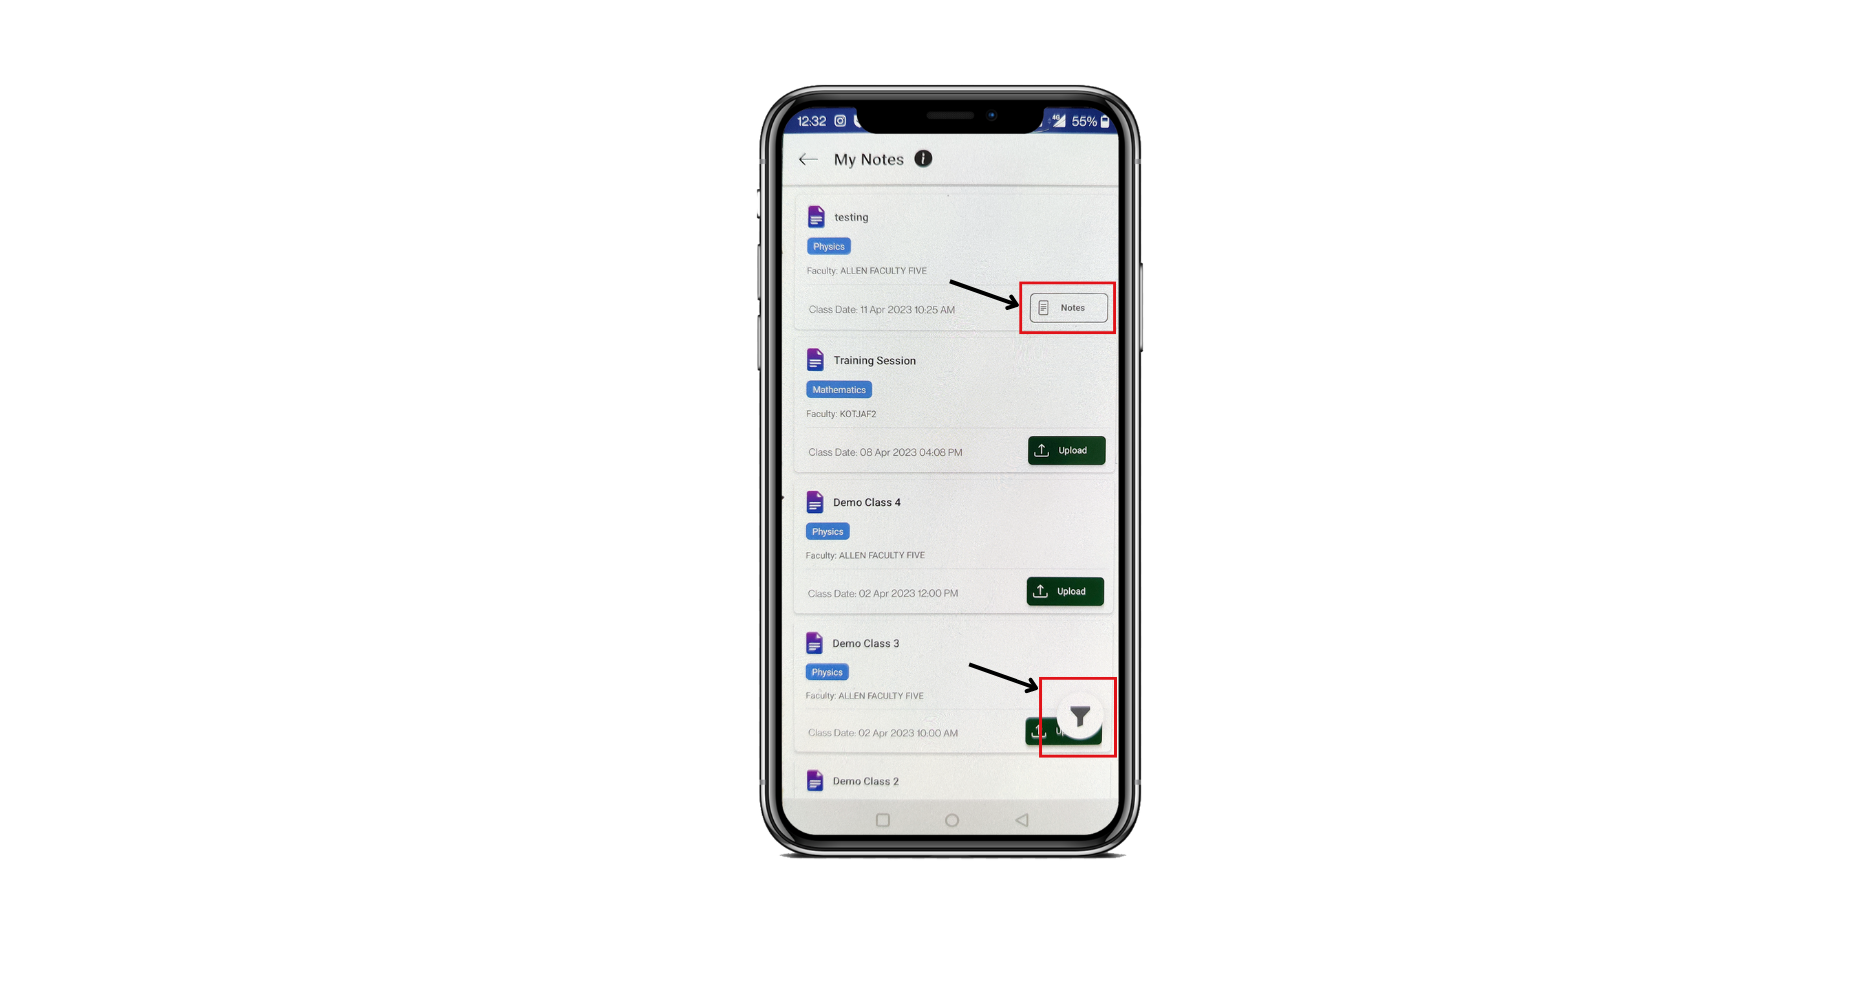 Fig: 05
As shown in Fig: 06
1. To delete the notes if uploaded incorrectly or not needed, click on the delete icon.
2. To upload additional files, click on the “Upload more” button & follow the same process.
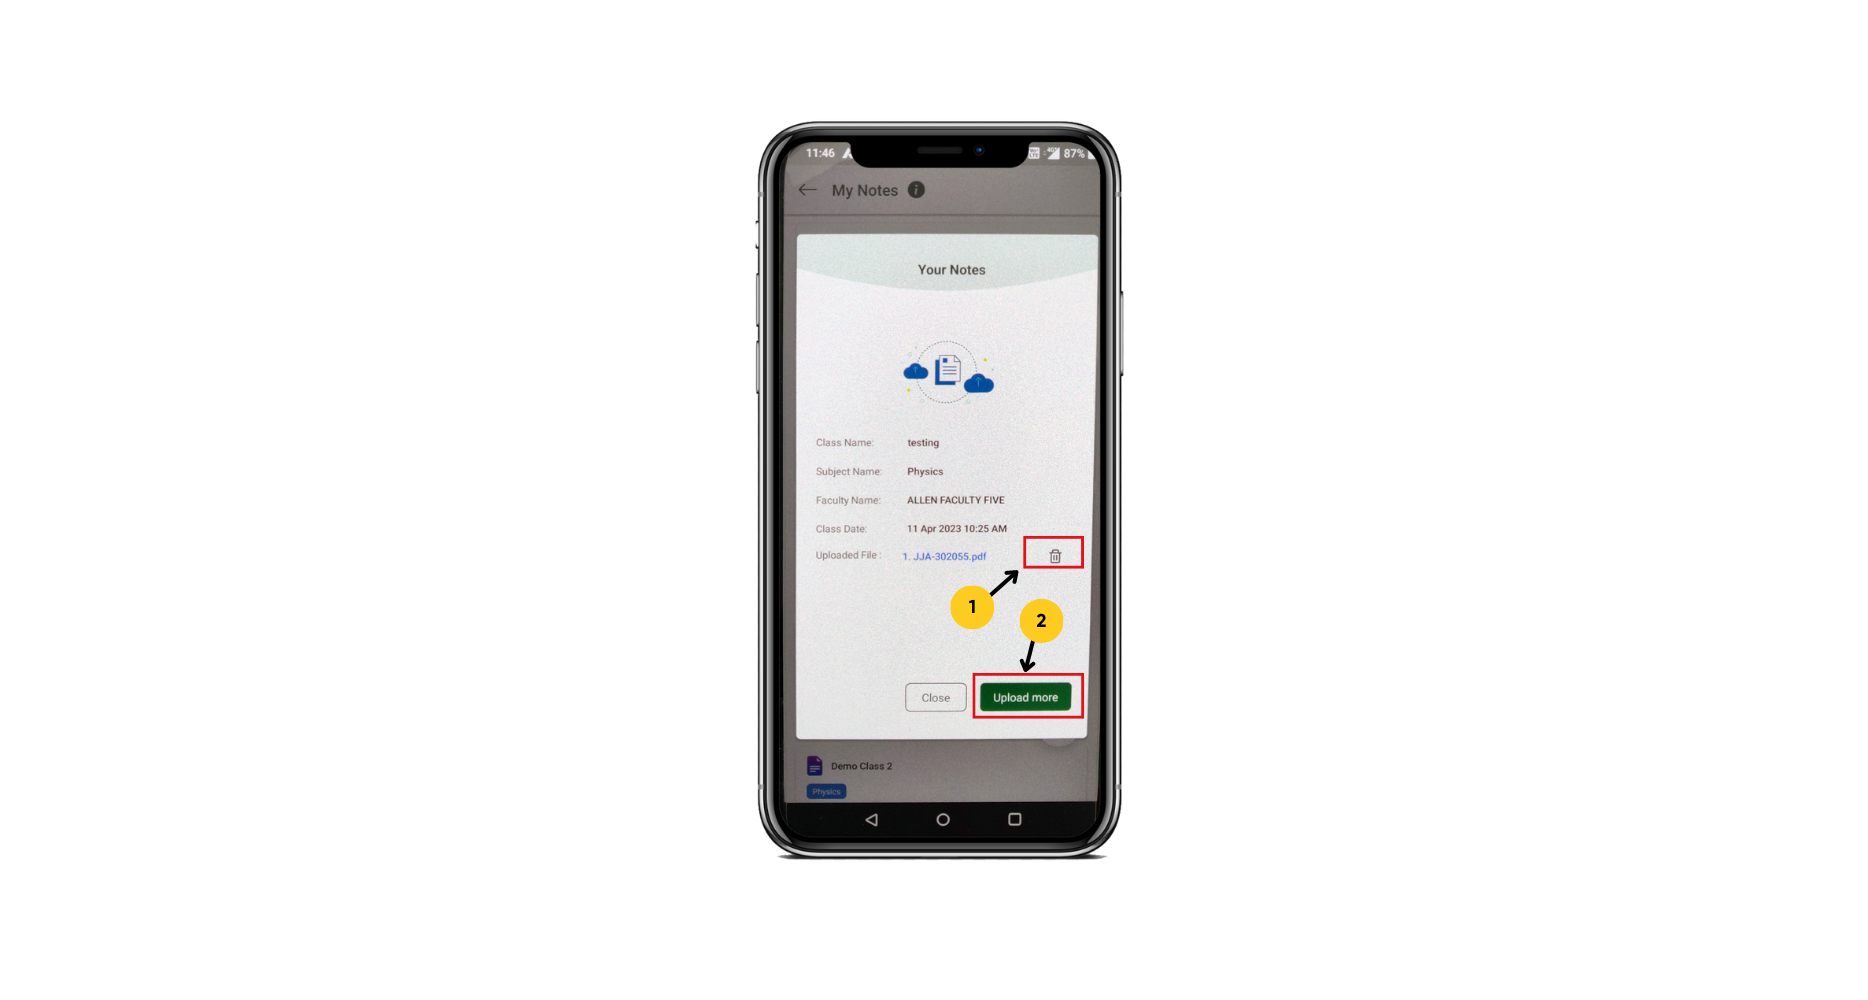 Fig: 06